

If you are struggling with dynamic blocks in AutoCAD, you are in the right place. If you have already created a block or are going to make a block, no issue, I will cover you in all steps. Let’s break the dynamic block creation process step by step. After reading this article, I am sure you will be able to create the best dynamic block in AutoCAD.
What are Dynamic Blocks?
A dynamic block in AutoCAD is a single block that can change its properties like size, angle, distance, perspective, or configuration using intelligent action parameters, unlike a static block. You can use features like stretching length or width, scaling sizes, rotation or flipping, or displaying different perspectives or versions of that block through a single master click option, which reduces your time in your projects.
Key features of dynamic blocks
- Parameters define the geometric constraints, or you can say the rules for a block. For example, you can use linear for stretching parameters, polar for rotation, array for multiple objects, and visibility parameters for switching between different states of a block.
- Actions are linked to parameters and define how the blocks will behave when any parameter is changed. For example, a “rotate” action can be linked to a rotation parameter to allow an object to change its angle.
- Visibility states: This feature allows you to control different states of a block. For instance, a single door block can have visibility states for “closed” and “open”.
- Grips a special custom triangular grip that appears when you select a block. You can manipulate these grips (e.g., clicking and dragging a grip) to perform the assigned action with a parameter to modify the block.
- Lookup tables: You can establish a list of predefined sizes or setups that users can conveniently choose from a drop-down menu while interacting with the block.
Common uses of dynamic blocks
Dynamic blocks can be a game-changer to earn you some extra bucks. It can enhance productivity and save time by simplifying numerous frequent design activities. A few examples include:
- Architectural elements: A single door or window block can be stretched to fit different widths, flipped for different directions, or have its visibility changed to show different hinged styles.
- Furniture layouts: Create a single block for a table that can be resized to different dimensions and change the number of chairs displayed.
- Mechanical parts: A fastener/bolt block can be set to display a predefined family of standard part lengths.
- Annotations and symbols: A callout block can be moved, stretched, or mirrored to show various drawing conditions.
Difference between Static Block and Dynamic Block
- Static Block does not change its size and shape, while Dynamic Block can be stretched, rotated, or mirrored within predefined rules.
- Must be edited to make changes to Static Block, while a single Dynamic Block can have multiple configurations to present.
- Static Block is easy to create, while Dynamic Block needs more setup to define parameters and values.
How to Create Dynamic Blocks in AutoCAD
Step 1
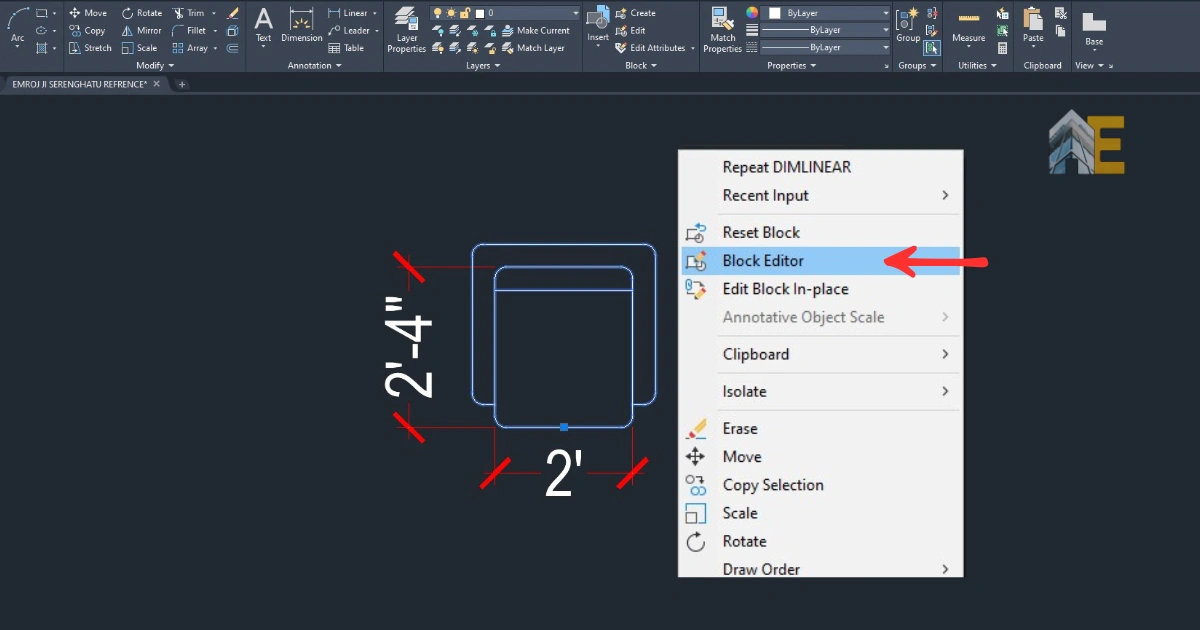
Open AutoCAD. As you can see, I am using a single-seater sofa block. First, select the block and open the Block Editor. If you have not created any blocks, follow step 2.
Download the Dynamic Block
Download the dynamic block .dwg file below.
Step 2
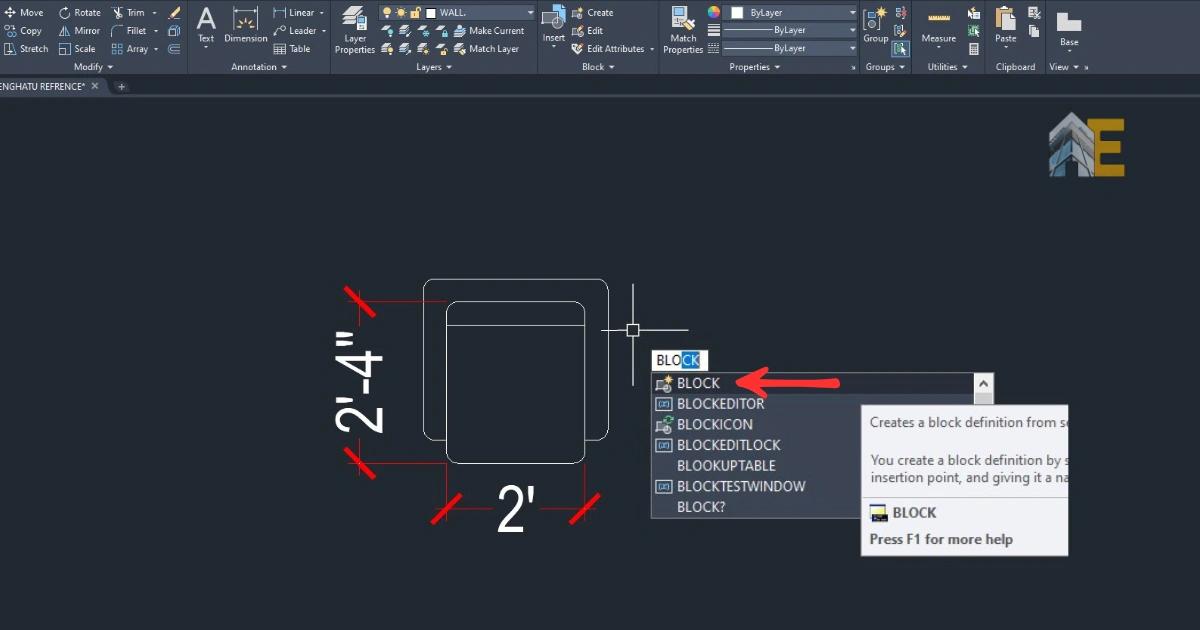
Select the object that you want to create a block and type the command “block,” and enter.
Step 3
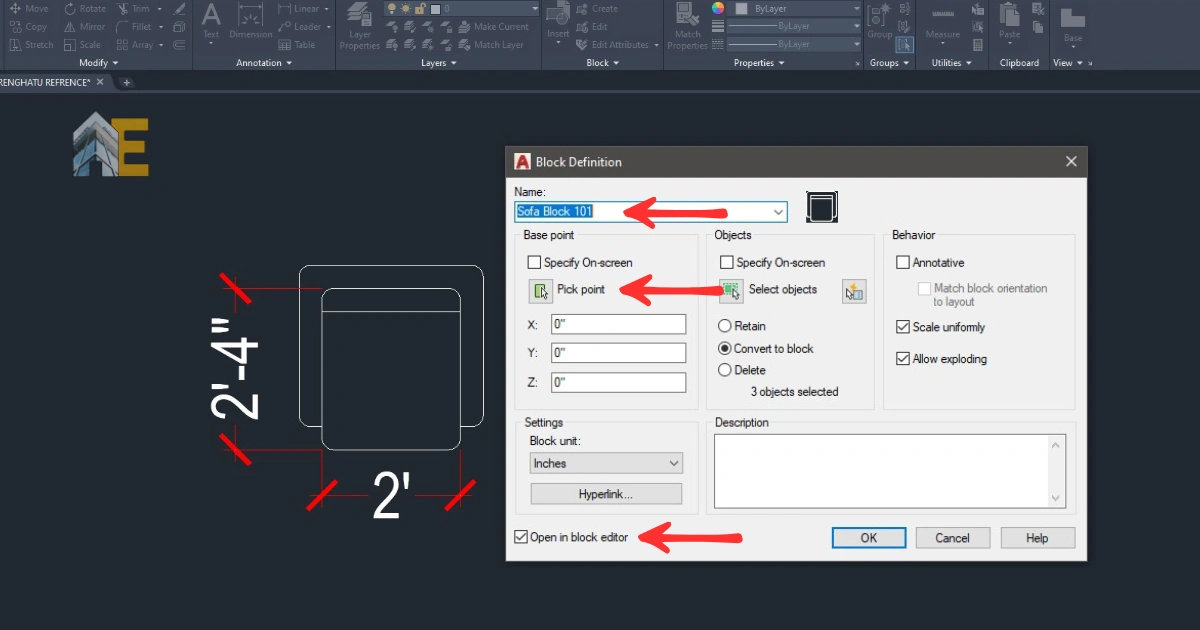
Then, a dialog box will open. Give a name to your block and click on ‘Pick Point’. Make sure to tick on “open in the block editor.
Step 4
Select any point that you want as the origin or pick point for the block, then click OK.

Step 5
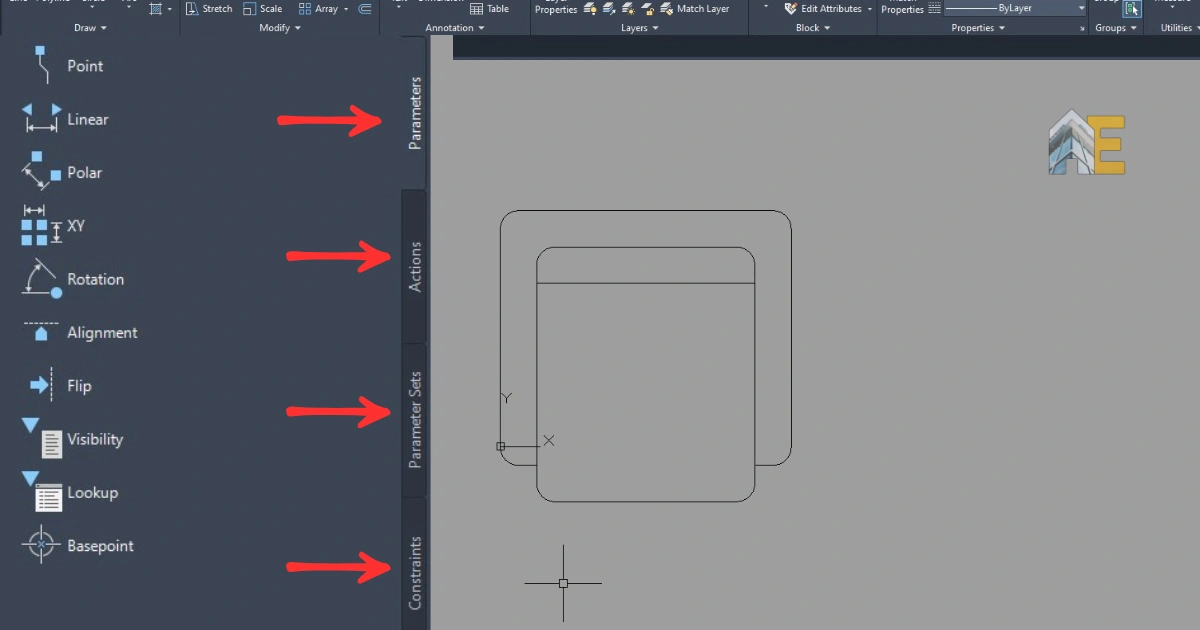
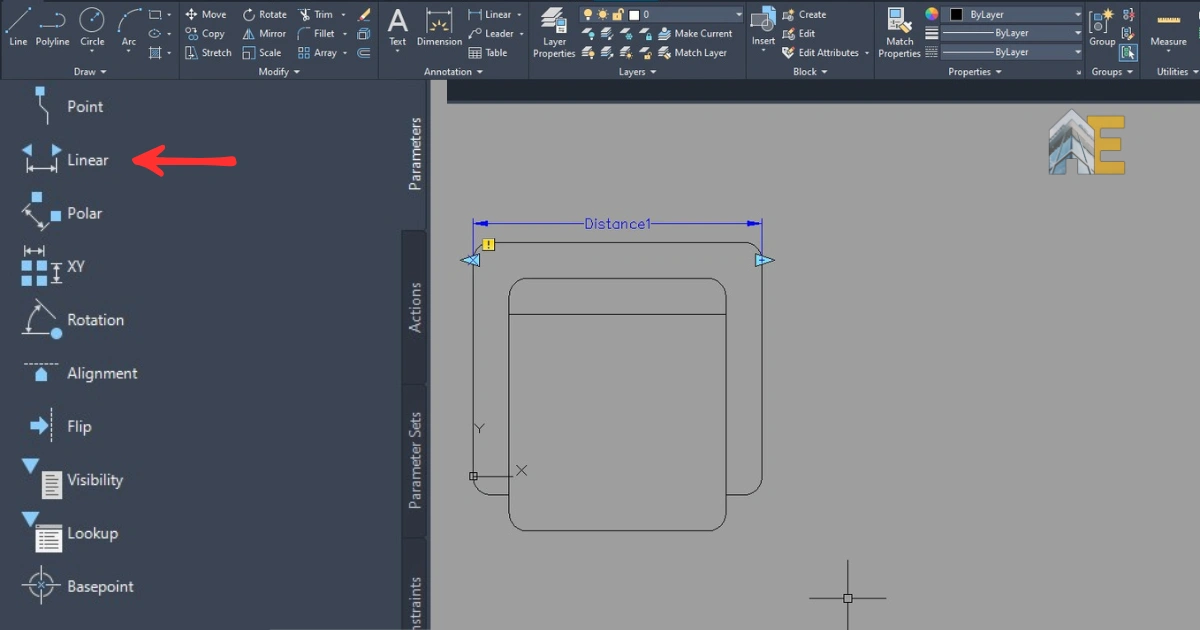
After clicking OK, the block editor will open the block you have just created. Now, notice that there are four panels in the left-side palette: Parameters, Actions, Parameter Sets, and Constraints. Click on “Parameters” and select “Linear Parameter.”
Step 6
Draw a distance from one point to the end point of the sofa, so that we can put action to the whole length.
Step 7
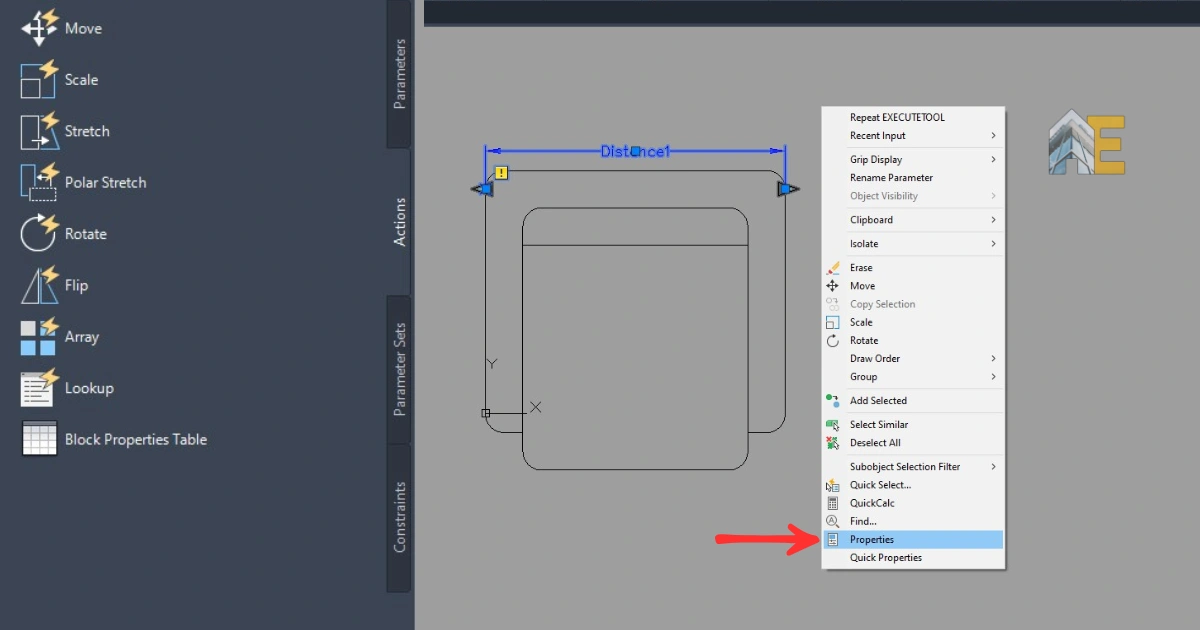
Select the distance parameter and press Enter, then right-click and go to properties.
Step 8
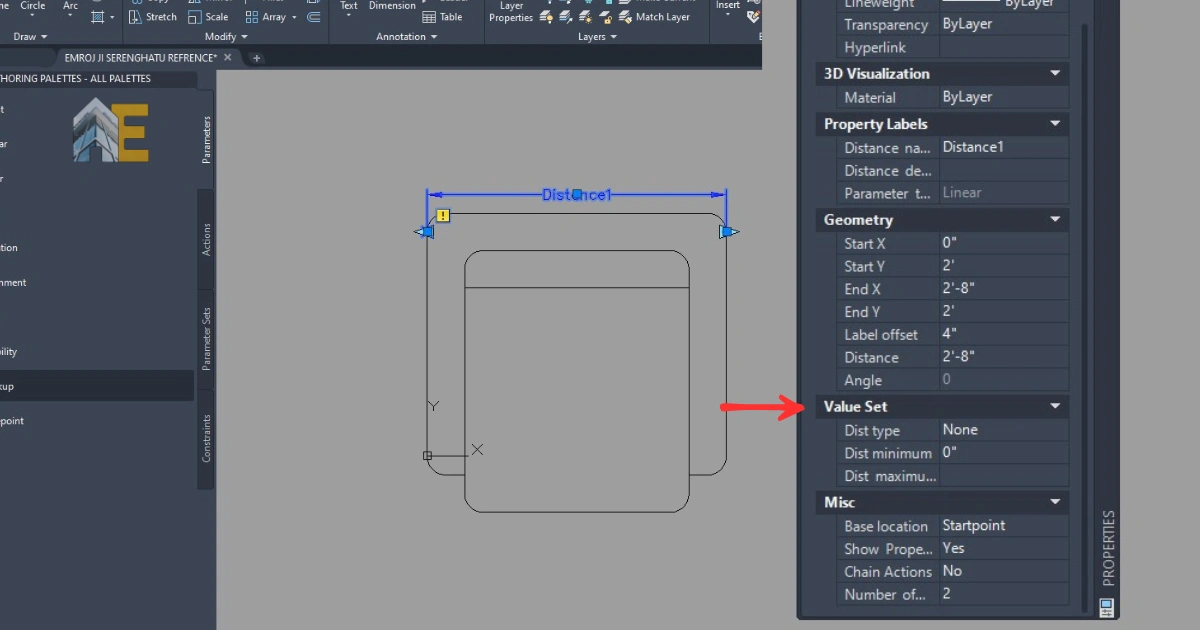
After the Properties panel is open, you need to set the value for the distance type, as well as the minimum and maximum distances.
Step 9
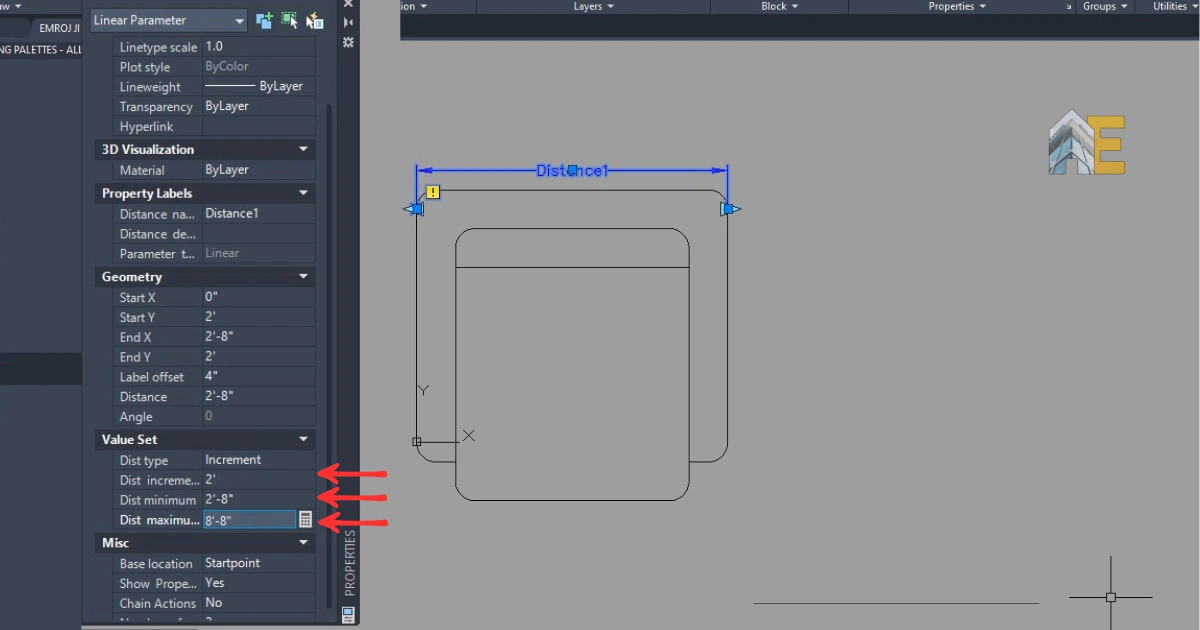
Enter the distance type increment because we need to stretch the sofa block to make it a multiseater. The increment distance will be 2′, the minimum distance will be 2’8″, and the maximum distance will be 8’8″ because we want a four-seater sofa.
Step 10
After that, go to the actions tab and select the stretch action, select the distance parameter, and enter.
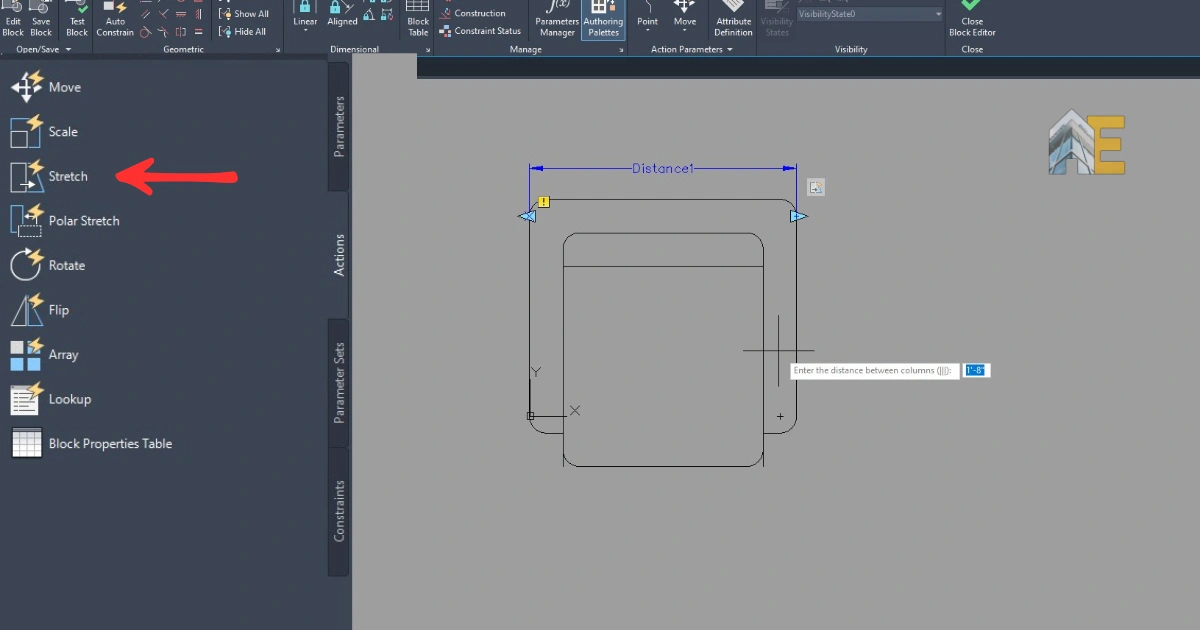
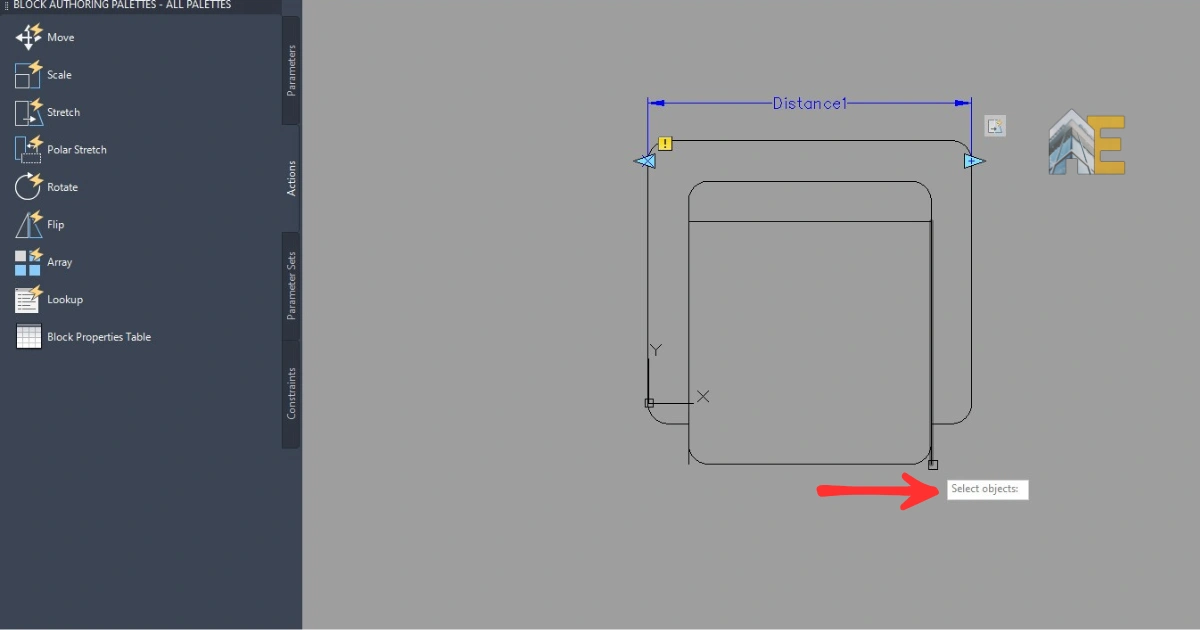
Step 11
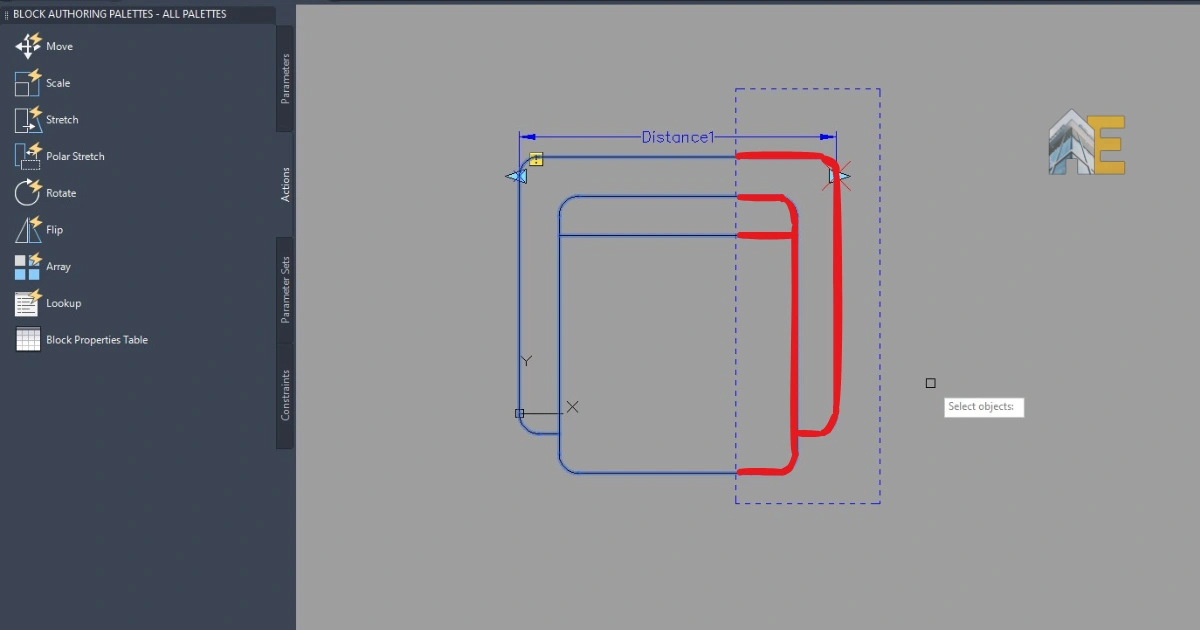
Now, create a box area and select the objects from where you want to stretch the object. Select only the stretching elements as highlighted in the image below. Press enter, save, and close the block editor.
Step 12
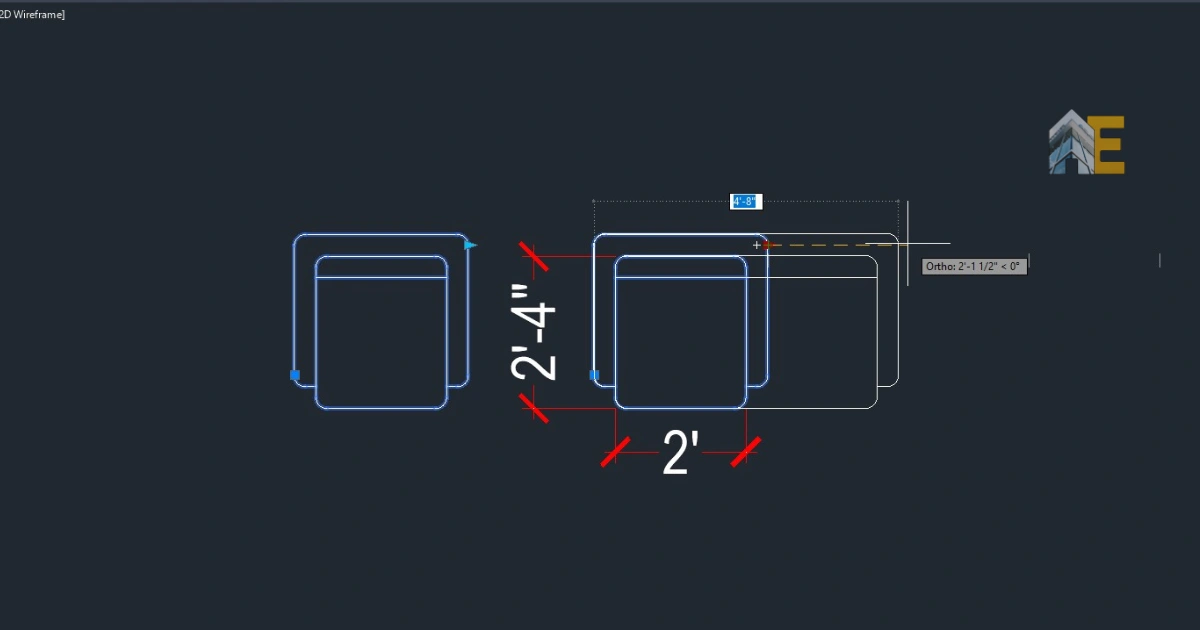
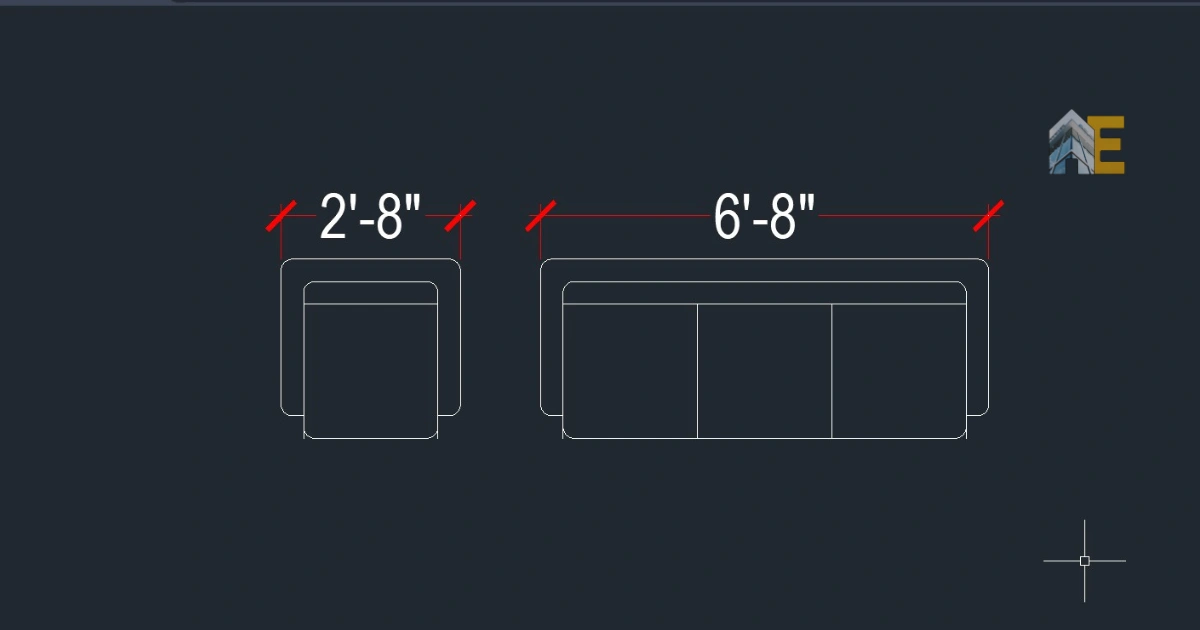
Awesome, you have just created a dynamic block that can stretch to a 4-seater sofa. Click the small triangular grip and try to stretch it.
Step 14
Now, let’s create an array action for this dynamic block. Click on the array action on the left side.
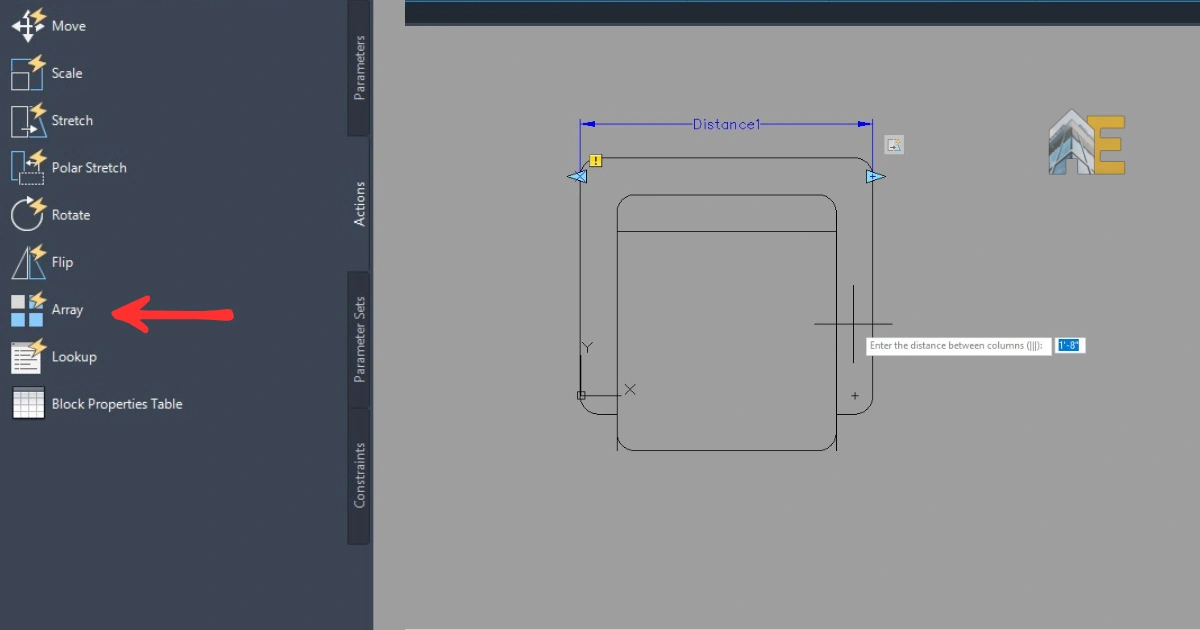
Step 15
Now, first select the distance parameter, and then choose the object you want to array, and press Enter. Enter the distance between two array objects. In this case, it will be 2′
Step 16
You can see in the image that there are two actions showing stretch and array action with one distance parameter.

Step 17
Save and close the block editor and try the awesome dynamic block you have created. It has two features, like you can stretch and array at the same time from a single seater sofa to a double, triple, or four seater sofa.
Download the Dynamic Block
Thanks for reading. Download the object and the dynamic block .dwg below.